I Need to Sew My Own Ribbons??
Once a dancer has been properly fitted in pointe shoes, the next step is to prepare them for wear. Because dancers feet are shaped differently, and because dancers tend to have specific methods of sewing their ribbons and elastics, pointe shoes come without the ribbons or elastic pre-attached. If you are getting your first pair of pointe shoes, this may come as a big surprise to you! However, rest assured that the time and attention needed to sew your own ribbons and elastic on your pointe shoes, just how you need them, is well worth the effort.
What Will I Be Doing, Exactly?
Ribbons and elastics should be sewn in such a way that they help the shoe to hug the dancers arch. This ensures that the mechanisms of support in the shoe can actually do their job! Because no two feet are the same, it is best for each dancer to sew her shoe in accordance with the shape of her own foot.
The following instructions I have put together are Ballet 5:8’s recommended starting point for any dancer. Many dancers alter the way they sew their shoes in order to best suit their own feet and ankles (I will give some examples throughout). That being said, it is always crucial to check these kinds of changes with your teacher and ask if it is safe for you and how to do it correctly.
Start Here

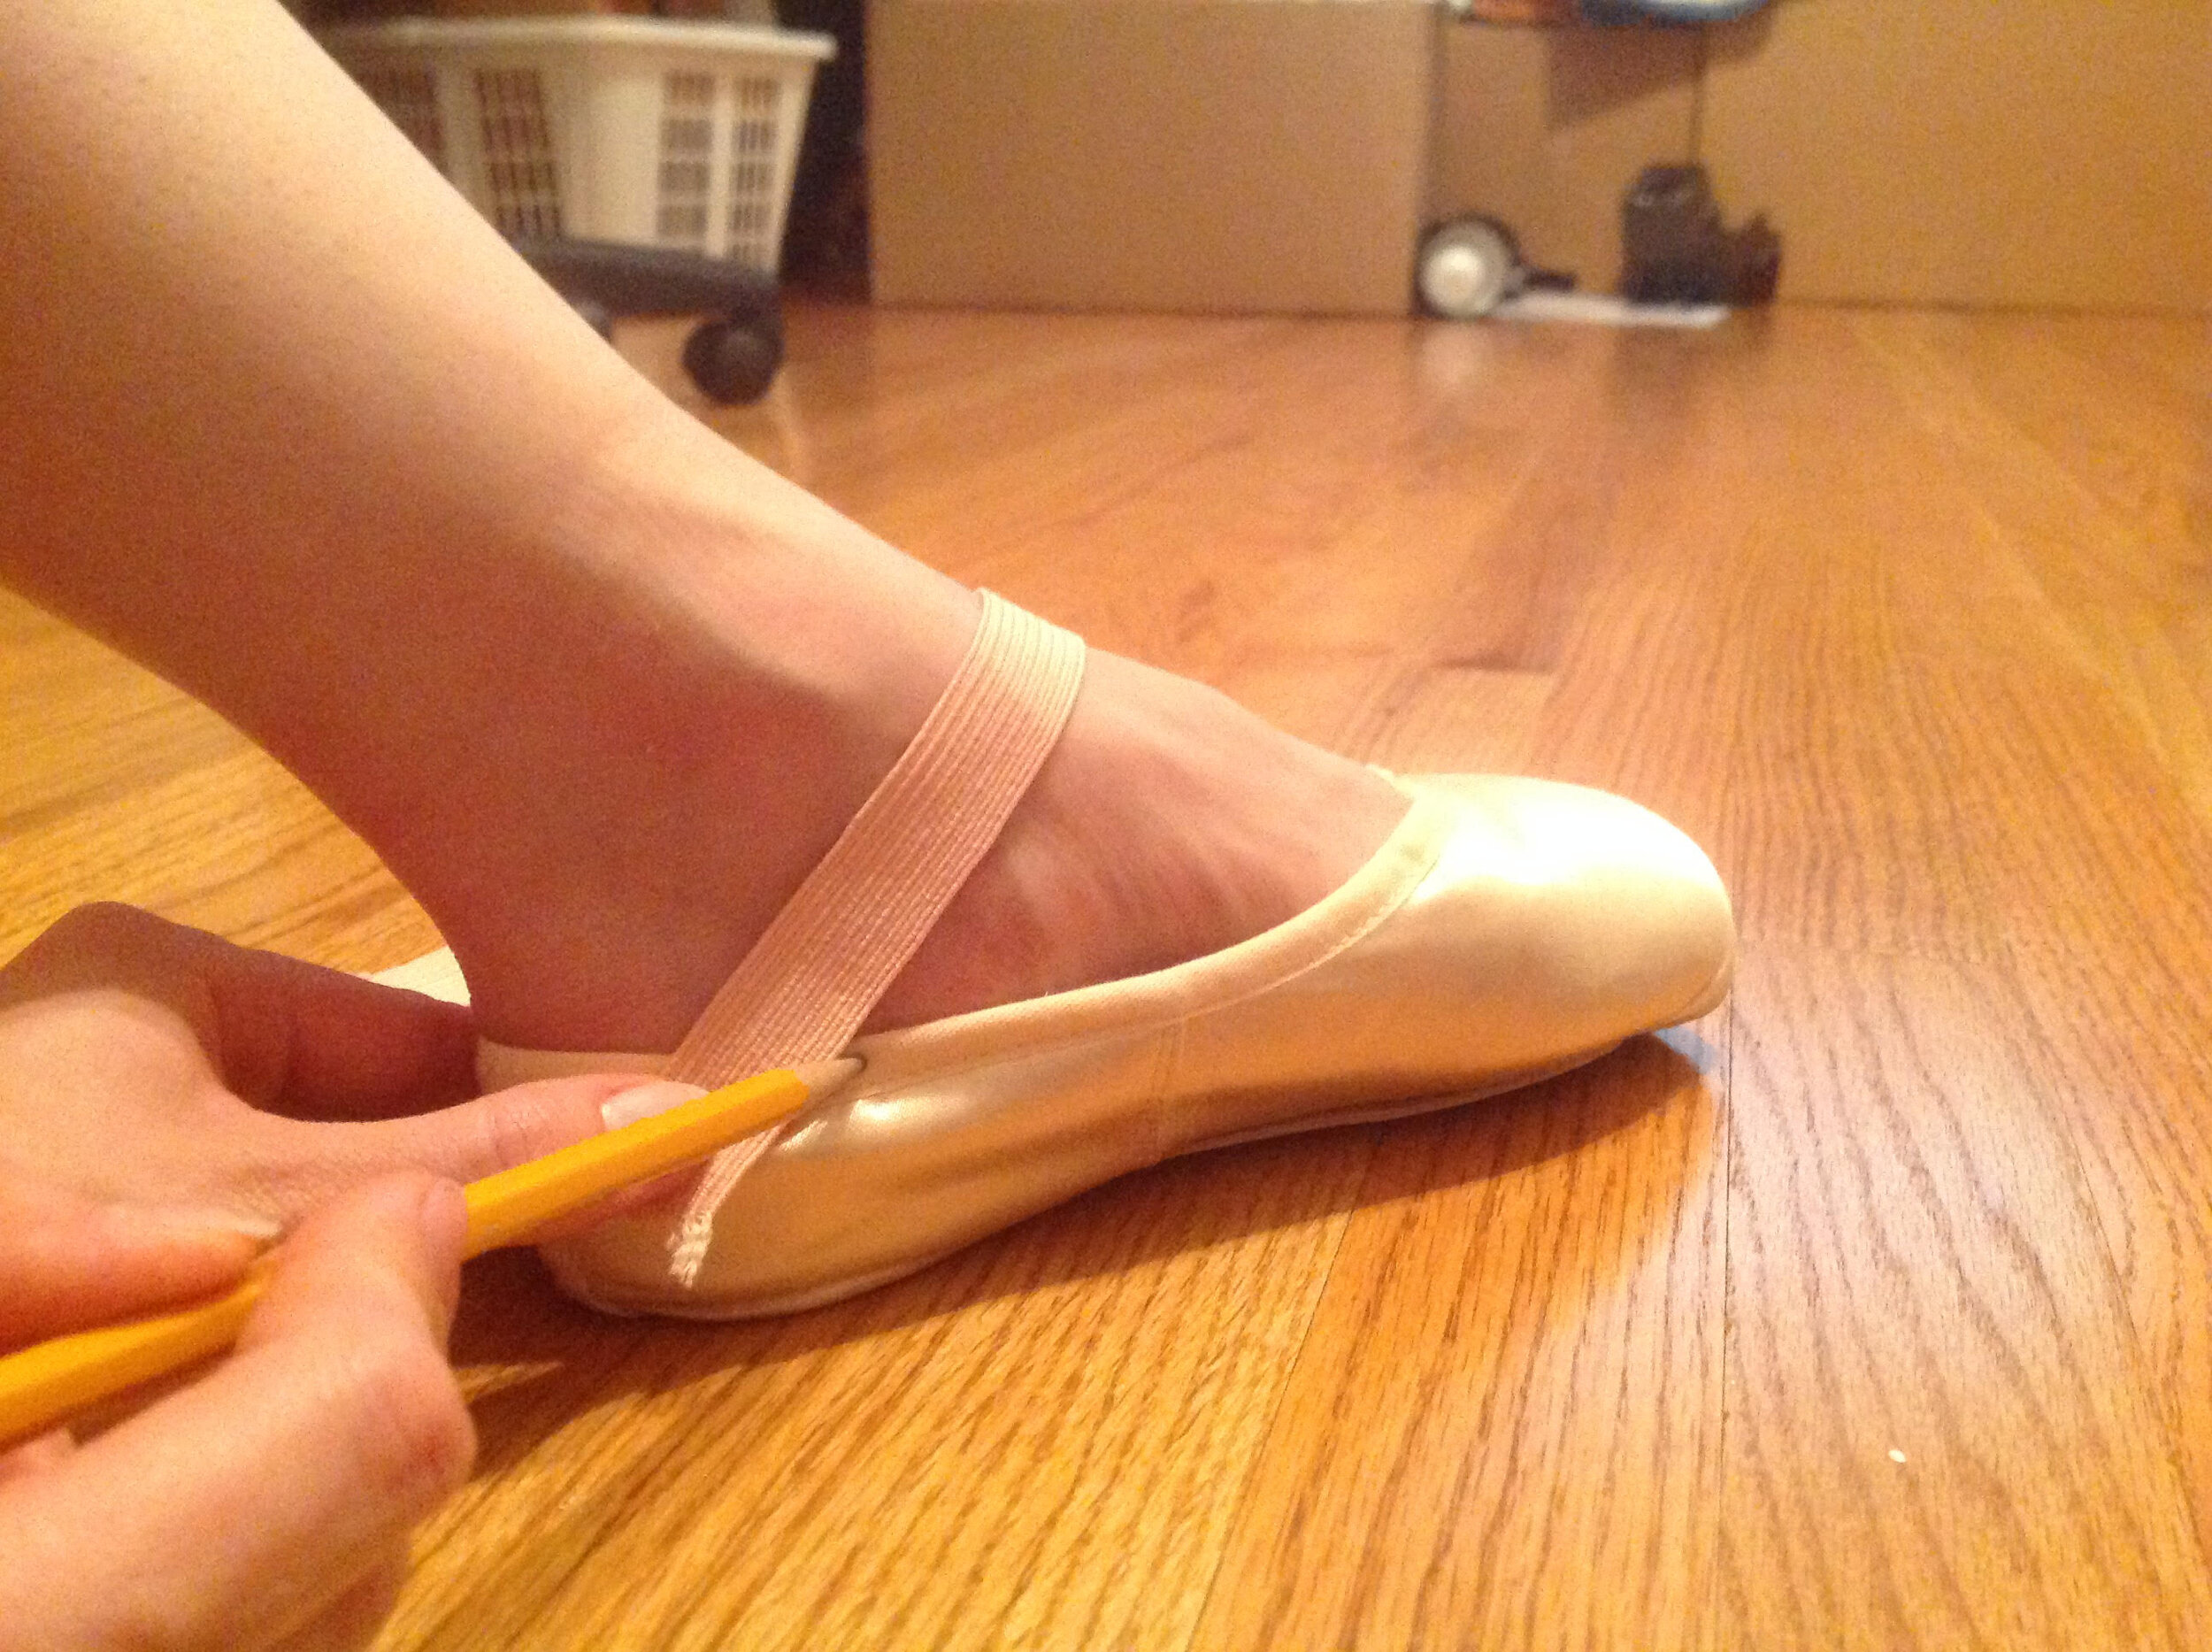
Most ribbon comes pre-cut in about a 6-foot length. Dancers will first need to cut this piece of ribbon in half, one for each shoe. The ribbons should be attached to the shoe at the highest point in the arch of the dancers foot. To do this, the dancer can place the pointe shoe on her foot, take a pencil and make a line on the inside of her shoe where the highest point of her arch is located. Dancers should also be sure to mark the placement of their ribbons for each foot, because each foot may be different!

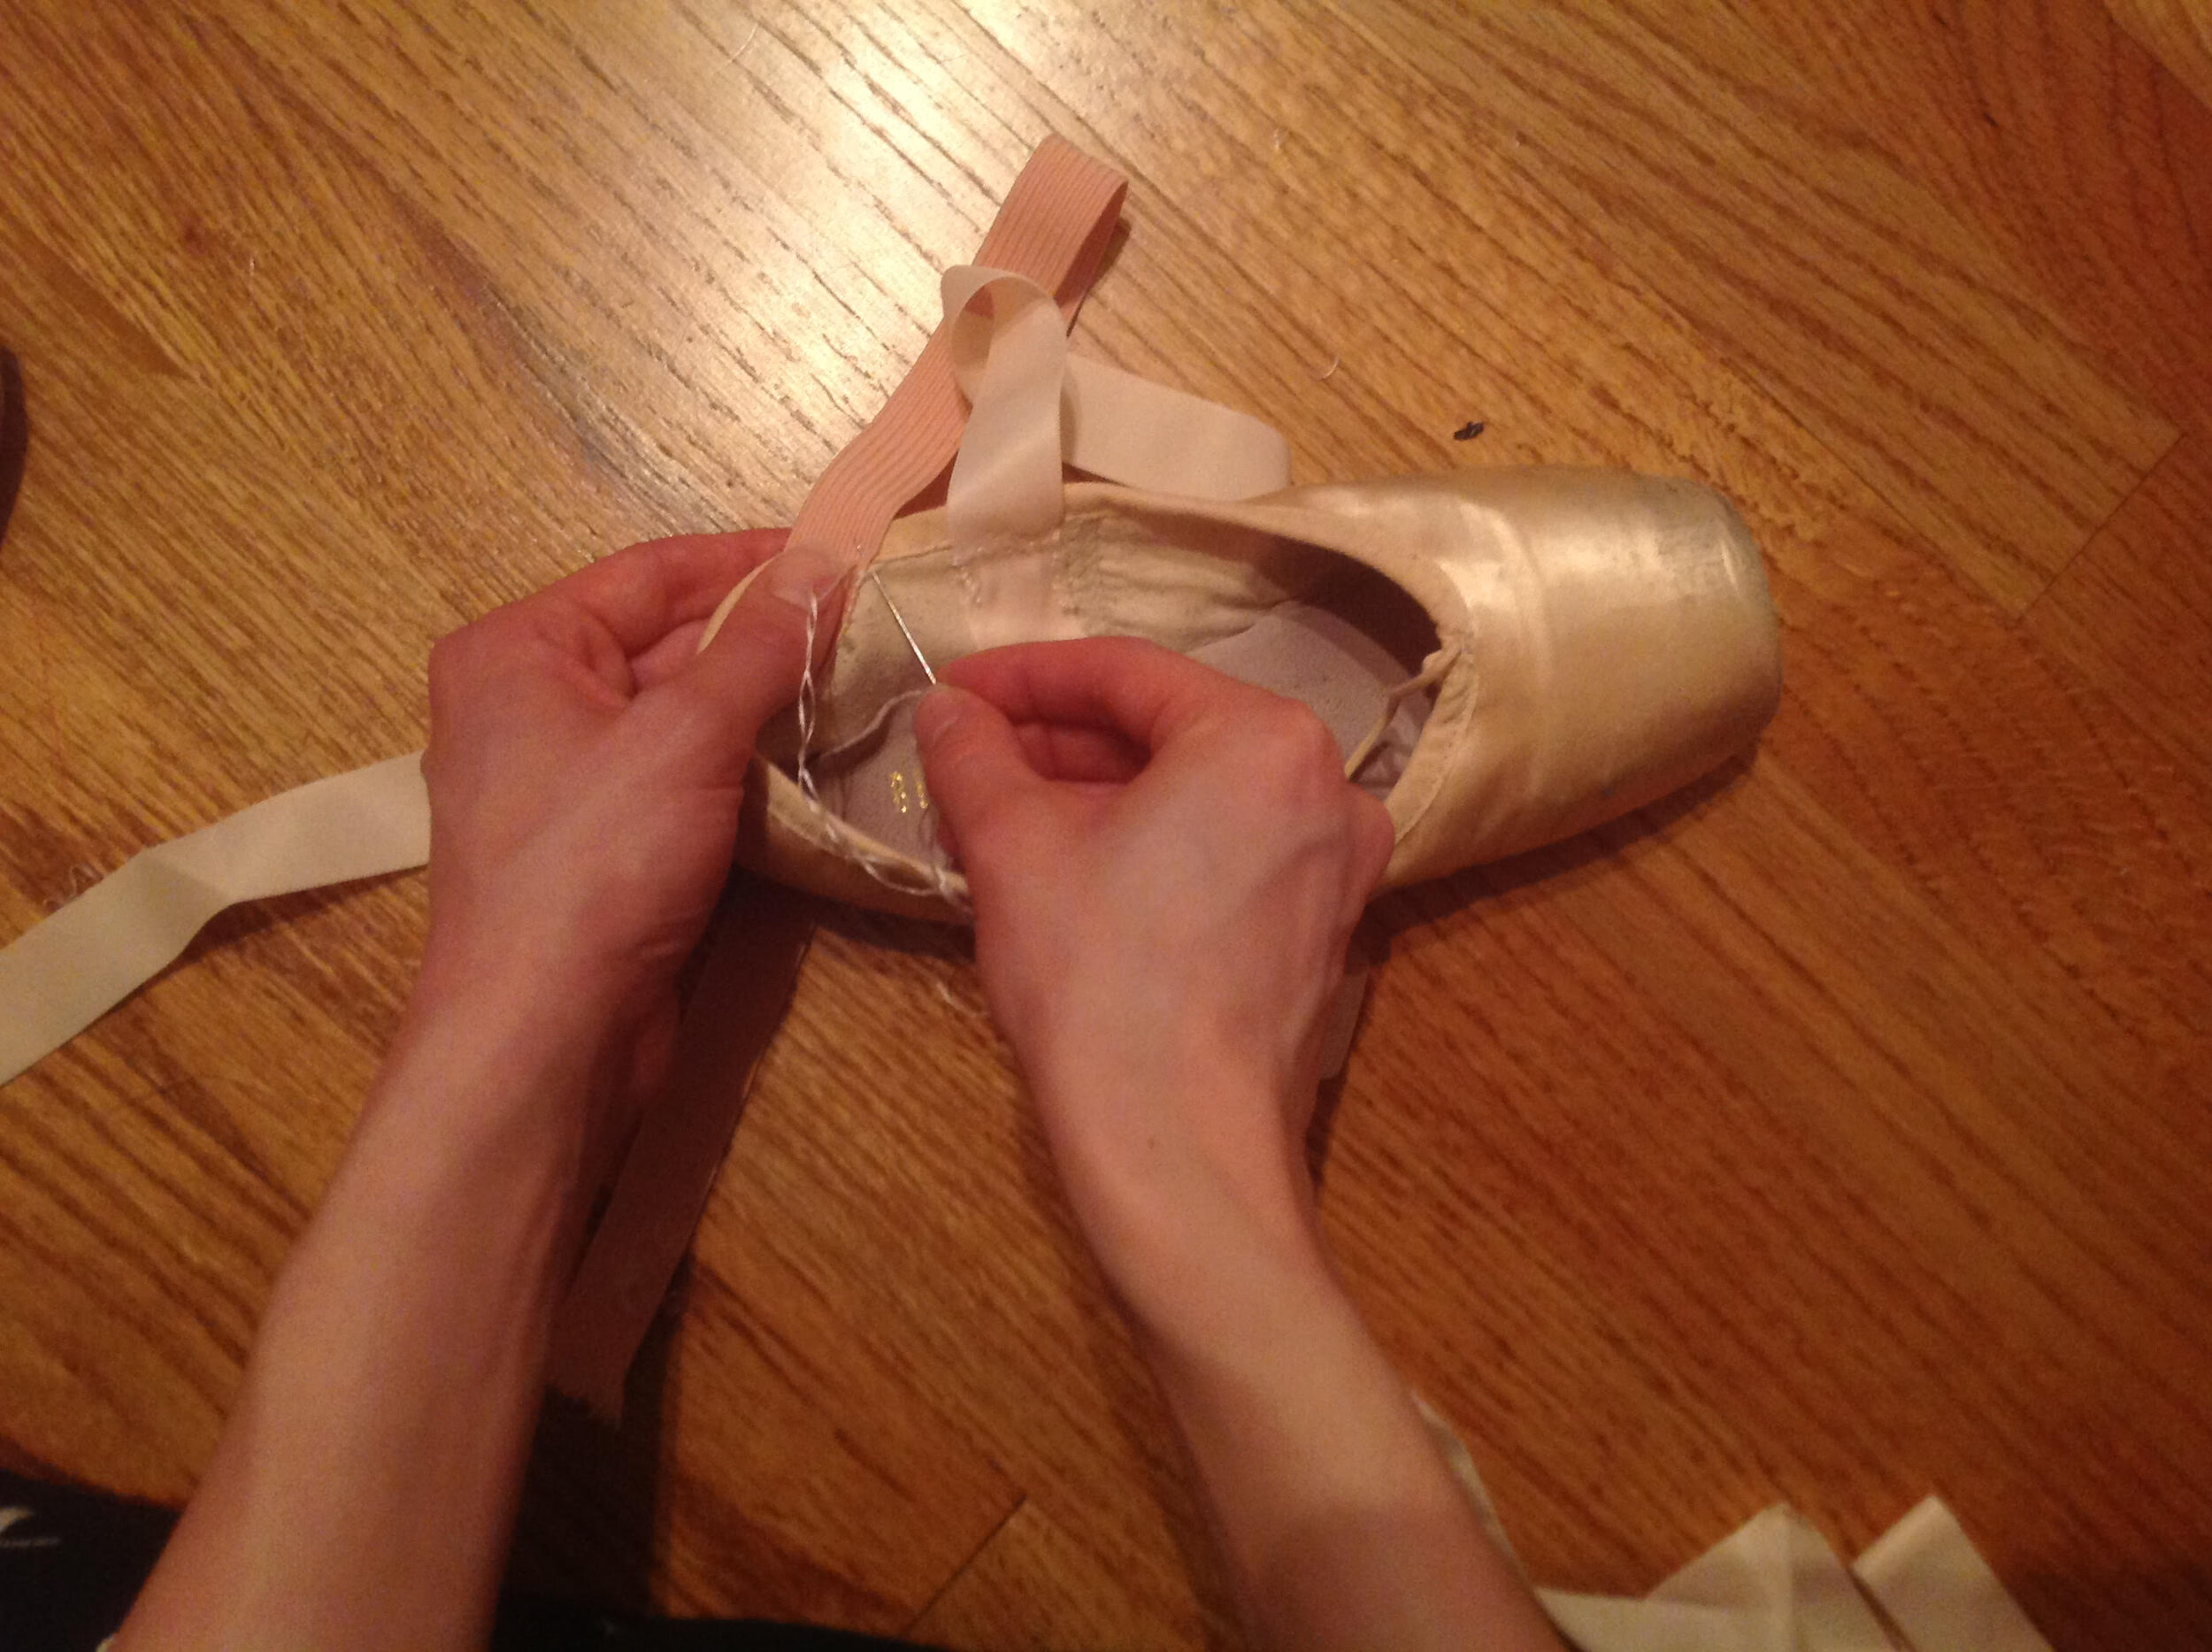
Ribbons should be placed on the shoe by lining up the center of the ribbon with the pencil park on the inside of the shoe, with the shiny side of the ribbon facing out. The dancer can then sew the ribbon to the inside of the shoe on each side with a whip stitch around the sides and across the top. Be sure to sew through the canvas, but not through to the satin on the other side of the shoe. Dancers should also be careful not to sew into the drawstring at the top. Sewing the ribbon on each shoe as one piece is helpful, particularly if one side of the ribbons becomes unattached. This will keep the ribbon in the shoe until the dancer can reattach it later! Some dancers like to sew 2 separate ribbons onto each shoe using the same method for placement. Some dancers also like to buy or make ribbon with elastic sewn into it. This gives the ribbon a little “give” so that while the ankle is moving between a flexed and pointed position, and thus changing in size, the ribbon can adjust.
There is some variety in the method of sewing elastics, however in general the elastics should be sewn onto the side of the shoe towards the back so that the elastic lies under each anklebone. The placement can again be marked using a pencil and the same whip stitch can be used. The shoe should be marked for placement on each side of the ankle, as the anklebones are slightly different on each side of the foot. The elastic should be just tight enough to offer support, but not so tight that it will cause irritation to the soft tissue of the ankle or hinder important blow flow that occurs on the top of the foot. Some students who have very flexible ankles find it helpful to sew 2 pieces of elastics on to each shoe that “criss-cross” for added support. Talk to your pointe teacher if you would like to know how to sew them this way!
Students should never dance in their pointe shoes with out ribbons. If they are correctly placed, the ribbons should do most of the work in holding your shoe. They take the brunt of the work in keeping the insole of the shoe next to the bottom of the foot so that the shoe can work properly. Because students are still developing the strength in their feet, it is not safe for them to dance with only elastics on their shoes. Additionally, when a dancer does not use ribbon, the elastic usually needs to be sewn on tighter to hold the shoe. This can cause irritation to the soft tissue at the top of the ankle and limit the blow flow into the ankles and foot that occurs there.
Once you have finished sewing your shoes, put them on and tie the ribbons to make sure that everything has been sewn on correctly and that the elastic is not too tight. Usually the ribbons are too long and need to be trimmed, so once the dancer has tied the knot in her ribbons on the inside of her foot, leave about 1 ½ to 2 inches of ribbon and cut of the excess. (Ask your pointe teacher for a demonstration in how to tie your pointe shoes if you do not already know!)
The ribbons over time will start to fray, so be sure to treat the end of the ribbon with some nail polish. You can also hold the ribbon close to a flame of a candle to melt the fibers at the end, however DO NOT DO THIS WITHOUT PARENT SUPERVISION!!
Now that our pointe shoes are ready for dancing, in the next blog post we will discuss how to make them last longer.
Former Ballet 5:8 Lead Artist Lauren Ader-Cumpston was a founding member of the Ballet 5:8 professional company and performed 2012-2017.